 my codex
Lowercase in VIM
Want to lowercase an entire section in VIM?
Use: gu<movement>
So, from cursor to end of line: gu$
From cursor to begining of line: gu^
For uppercase, same thing, just: gU<movement>
Want to lowercase an entire section in VIM?
Use: gu<movement>
So, from cursor to end of line: gu$
From cursor to begining of line: gu^
For uppercase, same thing, just: gU<movement>
Announcing the immediate availability of a new Zone Diet - Blocks lookup tool.
I’ve been eating with the “Zone Diet” for about a year and a half now. I really enjoy it and it works for me. I’m going to assume for the rest of this post that you know about the “Zone Diet”, if not - you can read more about it here.
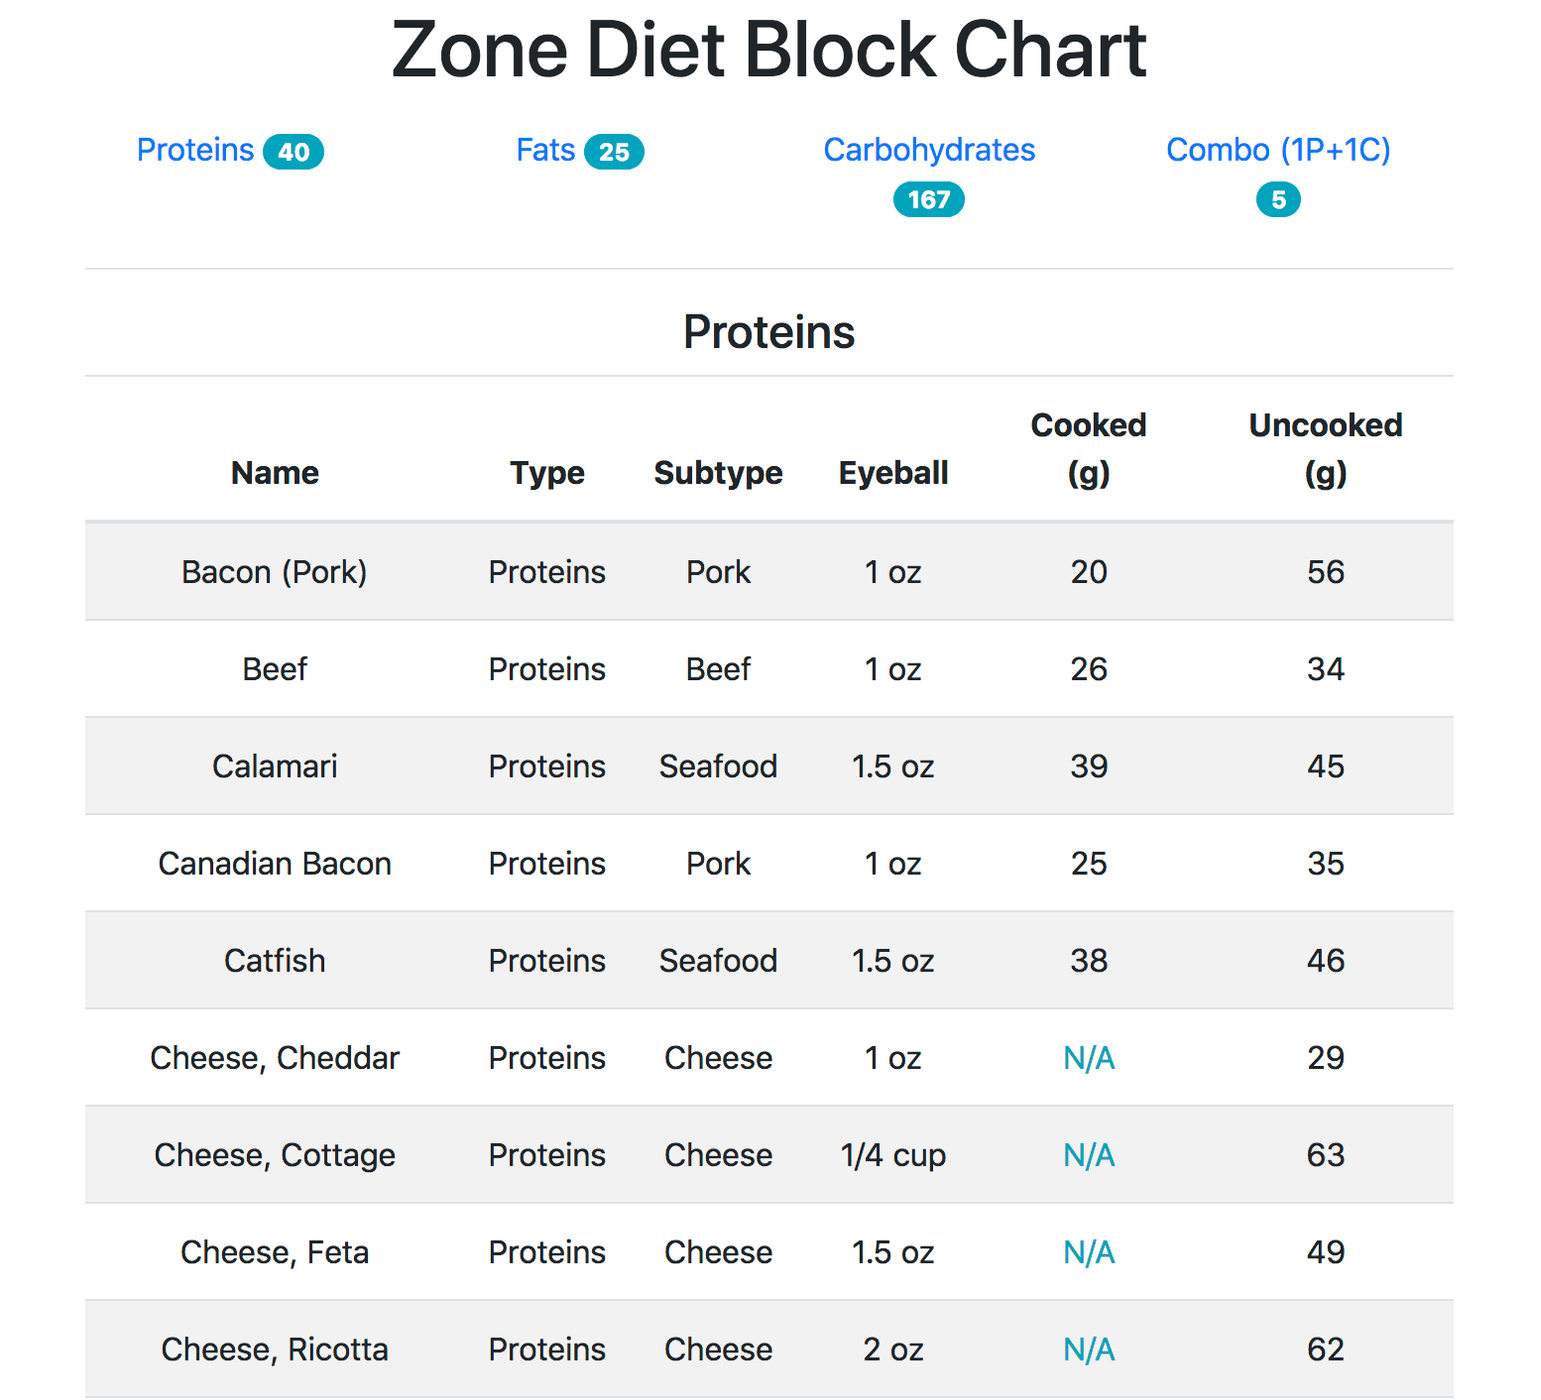
I’ve created a simple web application utilizing React and Bootstrap to make a quick and easy to use, mobile-friendly lookup table for Zone Blocks. Every row is the amount that makes up one block of each category (fat, carb, protein).
Most foods are available as a weight in grams as well as an “eyeball” amount (either cups, ounces, or count).
Consider this a first version and I’ll add to it to make it easier to use as I use it more.
Check it out here.
